You’re probably standing in a cold room right now, turning the thermostat up, waiting for that familiar warmth, and getting nothing. No heat, no click, maybe no sound at all. That’s a frustrating call to make in winter, but a baseboard heater not working usually follows a short list of causes.
The mistake I see most often is people chasing the wrong problem first. They assume the heater itself has failed, when the issue is a tripped breaker, a thermostat that’s lying about room temperature, or a hydronic unit that has air trapped in the line. If you sort the heater type first and stay methodical, you can often narrow the problem down fast.
A lot of wasted service calls happen because electric and hydronic baseboard heaters get lumped together. They shouldn’t. They fail differently, they’re tested differently, and the safe DIY line is different too.
Your First Five Minutes of Troubleshooting
Before you touch tools, start with the three things that solve a lot of “baseboard heater not working” calls.

Up to 40% of service calls for a baseboard heater not working are resolved by simple electrical faults like a tripped circuit breaker, especially in older homes with these systems, according to DiBiase Heating & Cooling's baseboard heater troubleshooting notes.
Start with the thermostat
Turn the thermostat well above room temperature. Don’t nudge it one degree. Move it high enough that the heater should clearly call for heat.
I’ve talked with homeowners who swore the heater was dead, only to find the wall thermostat was reading the room wrong. One older mechanical thermostat I came across was so far off that the room felt cold, but the control thought it had already done its job. The heater was fine. The signal wasn’t.
Look for these clues:
- No response at all: No click, no heat, no change after raising the setting.
- Delayed response: A long pause can point to control issues, not always heater failure.
- One room wrong, others fine: That often points to a local thermostat or local unit issue.
If you want a broader plain-English checklist for why your heating isn't working, that guide is useful for spotting the obvious things people miss when they’re cold and in a hurry.
Check the breaker the right way
A tripped breaker doesn’t always look fully “off.” Sometimes it sits in the middle. If you see that, push it firmly all the way off first, then back on.
Practical rule: If the breaker trips again right away, stop resetting it. That’s no longer basic troubleshooting. That’s a fault.
I’ve had plenty of calls where someone said, “I already checked the panel,” but they only glanced at it. Once they flipped the half-tripped breaker fully off and back on, the heater came back.
Look for airflow problems and blockages
This applies to both heater types. If the unit is packed with dust, covered by curtains, or blocked by a couch, it may overheat, shut itself down, or seem far weaker than it should.
Check for:
- Furniture too close: Baseboards need open space in front of them.
- Curtains or bedding touching the cover: That can trap heat where it shouldn’t stay.
- Dust packed in the fins: Heavy buildup acts like an insulation blanket.
A quick vacuum and clearing the space around the unit can make a “dead” heater start acting normal again. It sounds too simple, but simple problems are common.
Is Your Heater Electric or Hydronic
This is the fork in the road. If you identify the heater type first, you won’t waste time looking for a water problem in an electric unit or chasing wiring inside a hydronic one.

Confusing electric and hydronic heater problems is common, with 23% of homeowners reporting total non-heating that is often misdiagnosed. Hydronic repairs are also typically more complex and costly, averaging $300-800, as noted by Sartell Electrical's baseboard heater repair guide.
Quick visual check
Use the cover and what’s inside it as your clue.
| Heater type | What you’ll usually see | What it means |
|---|---|---|
| Electric | Thin metal fins around an electrical heating element, wiring entering the unit, no water pipe | Heat is made inside the unit itself |
| Hydronic | A pipe running through the unit, end caps tied into a boiler system, no exposed electric element doing the heating | Hot water flows through the unit |
Simple homeowner test
Ask these questions:
- Do you have a boiler somewhere in the home? That leans hydronic.
- Does the heater warm slowly and stay warm longer? That often leans hydronic.
- Does it heat quickly when power is on? That often leans electric.
- Do you hear gurgling or water movement? That strongly points to hydronic.
If you see thin fins and wires, think electric. If you see piping and the home has a boiler, think hydronic.
Once you know which one you have, the next steps get much easier.
Fixing a Silent Electric Baseboard Heater
Electric baseboard problems respond best to a straight sequence. Don’t skip around. The safest path is power, control, element, then wiring.

A systematic troubleshooting method can resolve up to 80% of electric baseboard heater issues. That includes checking the breaker in 40% of cases, the thermostat in 30%, and the heating element in 25%, according to Paul Davis's troubleshooting method for baseboard heat failures.
Shut the power off before opening anything
If you’re removing a cover, the breaker must be off. Don’t trust the thermostat alone. Baseboard heaters use line voltage, and that’s not the place for guesswork.
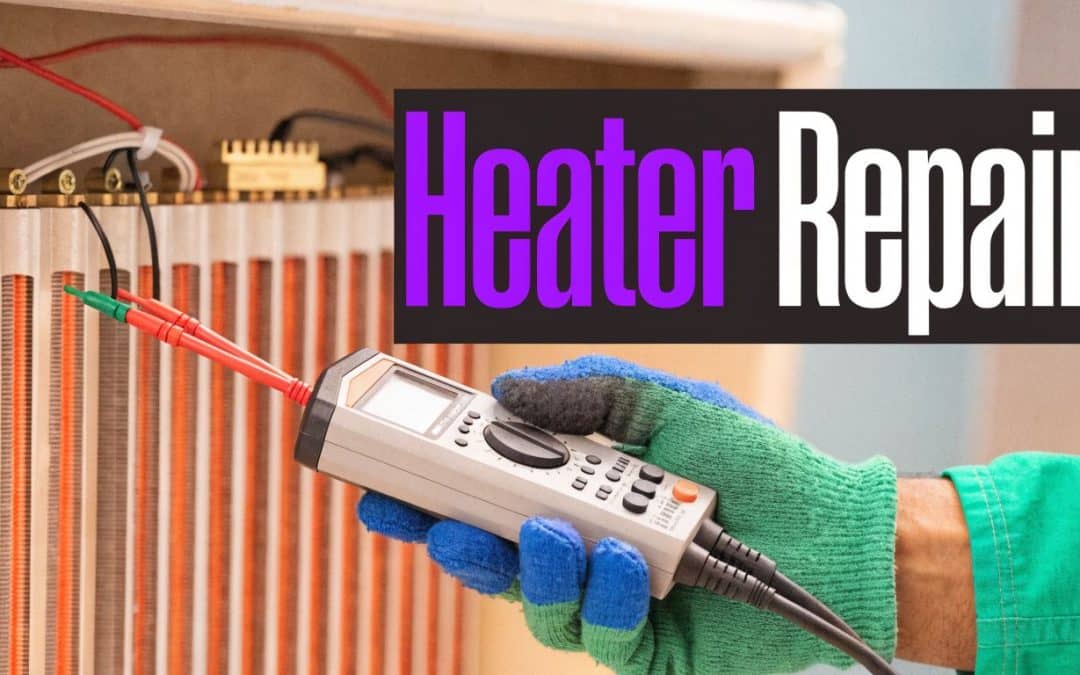
If you own a multimeter and know how to use it, verify power is off before touching internal parts. If you don’t own one, many homeowners stop here, and that’s reasonable.
Check the thermostat signal
A failed thermostat can make the heater look completely dead.
For people comfortable with electrical testing, the standard check is voltage across the thermostat terminals when it’s calling for heat. In many electric baseboard setups, you’d expect 240V at the thermostat when there’s a call for heat, and zero voltage points to thermostat malfunction in the troubleshooting process described by the same Paul Davis source above.
If you’re not testing voltage, use symptoms instead:
- Thermostat turns and clicks, but heater stays cold
- Display works on a digital control, but no heat comes on
- Other heaters on different controls work fine
One service call sticks with me because the heater looked burnt out from the outside, but the actual issue was upstream. A loose connection had heated up enough to damage the wire connector. The element was still good. Catching that early likely prevented a much uglier repair.
Inspect the heating element and inside of the unit
With power off and the front cover removed, inspect the element area closely.
Look for:
- Cracks or visible breaks
- Discoloration
- Burn marks
- Signs of melted insulation
- Heavy dust packed into the fins
Dust doesn’t just make the heater dirty. It can restrict airflow and trigger limit problems. Clean it gently with a vacuum and soft brush. Don’t bend the fins more than necessary.
A heater that “quit suddenly” after smelling hot often needs inspection, not another thermostat adjustment.
If you want to watch the general layout and testing approach before touching your own unit, this walkthrough helps:
Look at wire connections and limit problems
Loose wires can cause intermittent heat, buzzing, or complete failure. They can also leave blackened insulation or melted connectors.
Check visually for:
- Loose terminal screws
- Burnt wire nuts or scorched insulation
- Arcing signs near connection points
- A high-limit switch that may have tripped after overheating
If you find obvious heat damage, stop there. That’s no longer a cleanup job.
What works and what doesn’t
What works:
- Resetting the breaker once
- Vacuuming dust from fins
- Confirming the thermostat is really calling for heat
- Inspecting for visible damage with the power off
What doesn’t:
- Repeatedly resetting a tripping breaker
- Replacing parts by guess
- Twisting wires together without proper connectors
- Assuming a working thermostat display means a working thermostat circuit
Electric baseboard troubleshooting rewards patience. Random part swapping usually costs more than one careful diagnosis.
Solving Cold Spots in a Hydronic System
Hydronic baseboard heat fails in a completely different way. The element isn’t the problem here. Water flow is. If the room is cold, think circulation, trapped air, pressure, or a pump that isn’t moving hot water.

For hydronic heaters, air locks in pipes cause 35% of no-heat complaints, and bleeding the air can restore 90% of functionality. Another 25% of cases are tied to a silent, non-working circulator pump, based on EZ Snap Covers' hydronic baseboard troubleshooting guide.
Listen before you touch
Start at the boiler and the cold room.
Raise the thermostat for that zone and listen. A working circulator pump often gives a steady hum. If the pump is silent and the room stays cold, that’s an important clue. If the boiler is hot but the baseboard in the room isn’t, circulation is the next thing to question.
A homeowner once called about a freezing guest room while the rest of the house was comfortable. The key clue was the sound. They heard gurgling at the baseboard. That almost always points to air in the line. After bleeding the unit, the hiss of escaping air gave way to a steady stream, and warmth started returning shortly after.
Bleed trapped air carefully
If your system has a bleed valve and you’re comfortable using it, this is the first hydronic fix worth trying.
Use this sequence:
- Turn the thermostat up so the zone is calling for heat.
- Place a towel or container under the bleed point.
- Open the bleed valve slowly with the proper key or tool.
- Listen for hissing or sputtering. That’s trapped air leaving.
- Close the valve when water runs steady.
Don’t rush this. Air pockets interrupt flow, and a single stubborn pocket can make one room feel like the system is dead.
Gurgling means the system is talking to you. In hydronic heat, that sound usually means air is where water should be.
Check pressure and signs of sludge
Low pressure can leave upstairs rooms or far-end baseboards cold. If the boiler’s pressure gauge reads low, that’s not something to ignore. A leak, fill issue, or system fault may be behind it.
Here’s a simple symptom guide:
| Symptom | Likely direction |
|---|---|
| Gurgling in baseboard | Air lock |
| Cold unit but boiler hot | Circulation issue |
| Uneven warmth along one run | Flow restriction or buildup |
| Visible water near pipes or valves | Leak or failing connection |
If the heat is partial instead of fully absent, internal buildup may be slowing water movement. For a good plain-language explanation of debris and buildup in wet heating systems, Harrlie Plumbing's sludge solutions give helpful context.
When the pump is the real problem
A bad circulator pump changes the whole repair path. If the thermostat is calling, the boiler is operating, but hot water isn’t moving, the pump becomes a serious suspect.
That’s usually not a homeowner replacement job. You can observe it. You can report the symptoms clearly. But once you’re into pump diagnostics, electrical supply to the pump, or replacement, it’s time for a service call.
Common Parts and Typical Repair Costs
The smartest way to look at repair cost is by dividing the job into two buckets. First, parts that a careful homeowner might replace after a clear diagnosis. Second, parts and faults where labor, testing, and safety matter more than the part itself.
People often get tripped up. They see a relatively cheap part online and assume the total repair should be cheap too. Sometimes that’s true. Often it isn’t. Access, diagnosis time, and whether the fault damaged nearby wiring or controls can change the bill fast.
Budgeting the repair
The table below gives a practical planning range. It’s not a price book. It’s a way to compare simple fixes with work that usually belongs in professional hands.
| Component | DIY Part Cost | Professional Repair Cost (incl. labor) |
|---|---|---|
| Electric thermostat | Lower cost than major components | Higher than part-only cost because testing matters |
| Electric heating element | Moderate part cost | Usually more than a thermostat repair because the unit must be opened, tested, and reassembled |
| Wire connector or short damaged lead | Inexpensive material | Cost depends on whether damage is isolated or extends into the wall |
| High-limit switch | Usually modest if sold separately | Often paired with full diagnostic labor |
| Hydronic bleed valve | Usually modest | Higher when seized hardware or draining is involved |
| Circulator pump | Higher-cost part than a thermostat or valve | Typically one of the more expensive hydronic repairs |
| Zone valve or control component | Moderate to higher | Labor varies with system layout and wiring access |
How to judge a quote
Use three questions:
- Did they identify the failed part clearly? “Could be this or that” is normal early on, but the final quote should be specific.
- Are they repairing the cause or only the symptom? Replacing a thermostat won’t fix a burnt connection.
- Does the quote include testing after repair? It should.
A good tech usually explains the trade-off in plain English. For example, a minor electric repair may be worth doing on an older unit. A hydronic system with multiple circulation issues may justify a broader service visit, especially if several rooms are affected.
The cheapest quote isn’t always the least expensive repair. Misdiagnosis is what really burns money.
Know Your Limits When to Call a Professional
Some baseboard heater problems are worth trying yourself. Some are not. The hard line is safety.
While many issues are simple, 40% of baseboard heater failures are wiring-related and require a professional. DIY electrical repairs carry serious risk, OSHA data suggests 10% of home electrical accidents are linked to heating systems, and arcing from loose wires can melt insulation at 2000°F, according to the safety summary tied to this high-voltage baseboard repair discussion.
Red flags that end DIY troubleshooting
Stop and book service if you notice any of these:
- Burning plastic smell: That points to overheating insulation or a failing connection.
- Black marks on the heater, wall, or outlet area: That’s evidence, not a warning sign to ignore.
- Buzzing or crackling: Electricity shouldn’t sound busy inside a baseboard heater.
- Breaker trips immediately after reset: That’s a fault that needs diagnosis, not persistence.
- Visible melted wire insulation: The repair has already moved beyond basic maintenance.
- Water leaking from a hydronic unit: Especially if it’s active, not just an old stain.
Why experience matters here
A pro doesn’t just swap parts. A good tech traces the failure path.
I’ve seen simple-looking no-heat calls turn into hidden wiring problems inside the wall cavity behind the heater. From the room side, the cover looked normal. Inside, the conductor had overheated near a connection point and damaged more than the homeowner could see. That kind of fault won’t show up in a quick visual check from the front.
The right kind of service call
When you call, describe the symptom, not your guess.
Say things like:
- “The breaker resets and trips again immediately.”
- “There’s a burnt smell near one heater only.”
- “The boiler is hot, but this baseboard stays cold and gurgles.”
- “The thermostat display works, but the electric unit stays completely silent.”
That gets you a better dispatch than saying, “I think the heater needs replacing.”
A Warm Home and Peace of Mind
A baseboard heater not working doesn’t always mean a major repair. The fastest path is simple. Check the thermostat, check the breaker, clear the airflow, and then identify the heater type before doing anything more involved.
That one split matters. Electric units usually send you toward power, controls, elements, and wiring. Hydronic units send you toward circulation, trapped air, pressure, and pump issues. When you follow the right path, the problem gets smaller and clearer.
If you end up needing help, you’ve still done valuable work. You can tell the technician whether the breaker tripped, whether the thermostat called for heat, whether the unit is electric or hot water, and whether you heard gurgling, buzzing, or nothing at all. That saves time and usually leads to a faster fix.
If you need a professional example of what a dedicated heating service looks like, home heating system repair Orlando is the kind of specialized service page worth comparing against when you’re choosing who to call.
Stay methodical. Stay honest about the risks. Warmth comes back faster when the diagnosis is clean.
If you run a home service company and want more qualified heating repair appointments on the calendar, Phone Staffer helps by handling outbound cold calling, training callers, supervising them, building targeted lists, and booking opportunities for your team at scale.