Before you can even think about profit, you need a rock-solid estimate. For drywall, that starts with a simple formula: calculate your total square footage for walls and ceilings, then divide by the size of your sheets (usually 32 sq. ft. for a 4×8 sheet). But don't stop there. Always add 10-15% for your waste factor—this is non-negotiable for covering cuts, mistakes, and tricky angles. This basic math is the first step in any accurate bid.
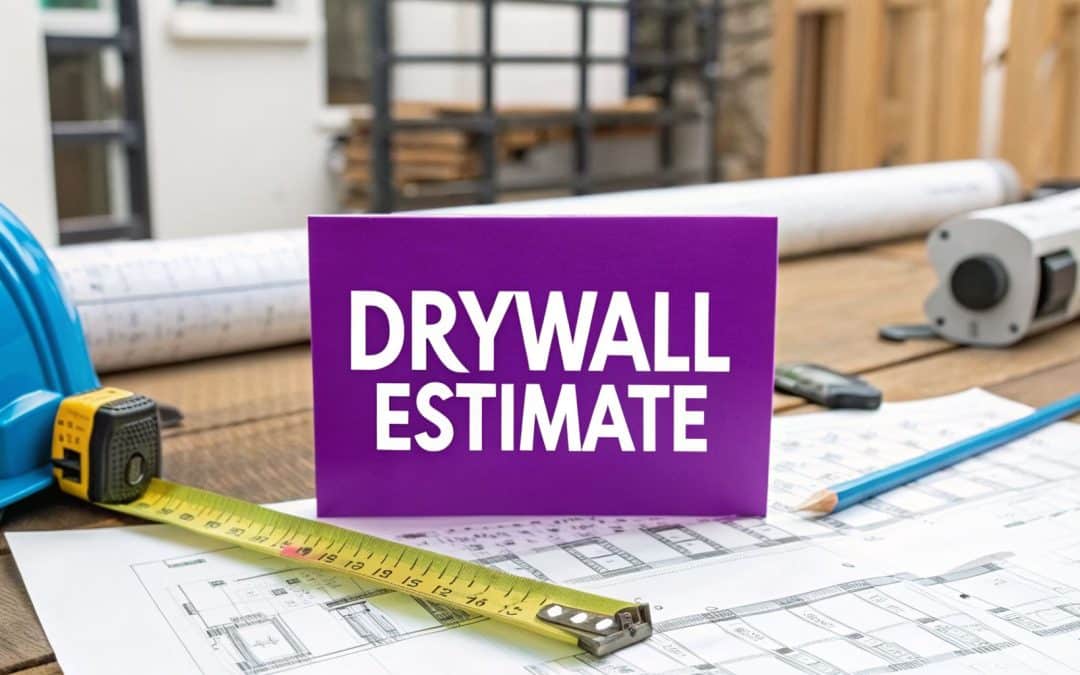
Your Foundation for an Accurate Drywall Estimate
Let's be honest: winging a drywall estimate is a surefire way to lose money. A precise bid is more than just a number you give a client. It's the blueprint for a profitable job, protecting your bottom line and keeping your customers happy. It’s the difference between a good month and telling your crew there are issues with payroll.
I'll never forget a story from an old friend in the business. Early in his career, he landed a big custom home with complex archways and a soaring two-story entryway. He was feeling confident, so he measured the main walls quickly and just eyeballed the tricky parts. Big mistake. He ended up short by nearly 20 sheets and completely misjudged the labor needed for all the intricate cuts. The job cost him over $3,000 out of his own pocket and delayed the project by a week. That costly lesson changed how he estimated forever.
Measure Twice, Cut Once
Every great estimate starts with a tape measure. Don't rush this part. Whether you prefer an old-school tape or a fancy laser measure, accuracy is what counts.
- Walls: Get the length of every wall and multiply that by the ceiling height. This gives you the wall's square footage. For now, don't subtract for standard-sized doors or windows—the extra material you account for here often gets used up in the cuts and waste around those openings anyway.
- Ceilings: This one’s easy. Just multiply the room’s length by its width.
- Complex Areas: When you hit a stairwell or a room with vaulted ceilings, don't panic. Break the space down into simple shapes you can work with, like rectangles and triangles. Measure each one on its own, then just add their square footage together for a total.
The most common—and expensive—mistake I see is forgetting to measure a surface entirely. It's easier than you think to miss a big closet or even the ceiling in a main room. Make a simple checklist for every single job: Walls, Ceilings, Closets, Hallways. Check each one off as you go.
Choose the Right Materials for the Job
Not all drywall is the same, and the type of board you pick has a direct impact on your material costs and your labor. Using the right board isn't just about following code; it's about delivering a professional finish that lasts.
To help you out, here’s a quick-reference table breaking down the most common types of drywall and where they’re best used.
Quick Reference for Drywall Sheets and Materials
| Drywall Type | Common Thickness | Primary Use Case | Pro Tip |
|---|---|---|---|
| Standard | 1/2" | General purpose for most walls and ceilings in living areas and bedrooms. | This is your go-to, cost-effective workhorse for the bulk of residential projects. |
| Moisture-Resistant | 1/2" | High-humidity zones like bathrooms, kitchens, and laundry rooms. | Also called "green board," its treated core helps prevent mold and mildew growth. |
| Fire-Rated (Type X) | 5/8" | Garages, furnace rooms, and walls between multi-family units. | This board is thicker and heavier, so factor in more time and effort for cutting and hanging. |
| Abuse-Resistant | 5/8" | High-traffic commercial areas like hallways, schools, and hospitals. | It has a denser core designed to withstand impacts, but it costs more. |
Understanding these material differences is a key part of building a reliable estimate.
Mastering this skill is crucial, especially now. The global drywall market was valued at USD 51.6 billion in 2025 and is expected to climb to USD 98.2 billion by 2034. Nailing your estimates puts your business in a prime position to grab a piece of that growth. And as your business expands, you'll need help managing the administrative side; for more on that, see our guide on how to hire a virtual assistant.
Nailing Down Your Material Needs to the Last Sheet
This is where your estimate really takes shape. Getting your material count right is the difference between a profitable job and one that bleeds money. We're moving beyond a simple square footage guess and into the strategic thinking that separates the pros from the rookies.
First things first, you need to turn your total square footage into a specific number of drywall sheets. The key here is to think about efficiency, not just coverage. The most common sizes you'll be working with are 4×8, 4×10, and 4×12 sheets.
- 4×8 sheets (32 sq. ft.) are the old standby. They’re easy for one person to haul around and hang.
- 4×10 sheets (40 sq. ft.) are perfect for rooms with 10-foot ceilings, helping you avoid extra horizontal joints.
- 4×12 sheets (48 sq. ft.) are a finisher’s best friend on long, open walls. They can seriously cut down on your taping time.
At its core, the process flows from measuring the space, to picking the right materials, and finally, to calculating your complete estimate—waste included.

It seems straightforward, but the real expertise comes from making smart choices at each stage.
How Sheet Size Changes the Game
Choosing the right sheet size is a money move that directly affects your labor costs. I saw this play out perfectly with a contractor bidding a big commercial job with long, 200-foot hallways. His go-to was standard 4×8 sheets—they were just what he always ordered.
After we walked the site, I convinced him to switch the order to 4×12 sheets and run them horizontally. By doing that, we eliminated dozens of butt joints down those long corridors.
The result? He told me it led to a 30% reduction in taping and finishing labor for those areas. The material cost a bit more upfront, but the huge labor savings dropped thousands more in profit right to his bottom line.
This is what estimating is all about. You’re not just trying to cover the walls; you’re trying to do it in a way that creates the least amount of work for your finishers. Fewer seams mean a faster job and a cleaner final product.
The Truth About the Waste Factor
Now, let’s get real about the "waste factor." I hear people throw around a flat 10% all the time, but that's a rookie mistake. Slapping a generic 10% on every single job is a surefire way to kill your accuracy.
The complexity of the job should dictate your waste calculation.
- Simple, boxy rooms with 8-foot ceilings: You can get by with a tight 5-7% waste factor. You'll have very few tricky cuts, so scrap will be minimal.
- Rooms with lots of windows, doors, and closets: Bump that up to 10-12%. Every opening means more cuts and more unusable pieces.
- Complex layouts with angled walls, vaulted ceilings, or arches: Here, you need to plan for 15-20% waste. All those funky angles and curves produce a ton of scrap.
Thinking this way keeps you from over-ordering on easy jobs (which ties up your cash) and, more importantly, from running out of material on a complex one (which causes frustrating delays).
A Quick Story on Why Systems Matter
I once consulted for a fast-growing renovation franchise that couldn't figure out why their profits were all over the map. Some of their locations were killing it, while others were barely breaking even on jobs of the same size.
When I dug into their process, the problem was obvious: their waste factor was a total guess. One franchisee used 8%, another used 15%, and a third just winged it. That lack of a system was destroying their bidding accuracy.
We fixed it by creating a simple, standardized system. We defined three job types—"Standard," "Semi-Complex," and "Complex"—and assigned each a specific waste factor based on an analysis of hundreds of their past projects.
The change was almost immediate. Within six months, the entire franchise reported a huge jump in bidding accuracy. The struggling locations saw their margins climb because they finally stopped underbidding the tough jobs. It just goes to show that building a smart system for your estimates brings the consistency you need to be profitable.
Estimating Your Drywall Finishing Materials

Hanging the board is a big step, but let's be honest—the job is far from over. The real craftsmanship, and where a lot of budgets get completely blown, is in the finishing. If you want your estimate to be accurate, you need to account for every single roll of tape, bucket of mud, and stick of corner bead.
I once knew a contractor who was constantly running out of joint compound. His crew would get into a good rhythm, and then bam—everything would grind to a halt for an emergency run to the hardware store. It was a huge source of frustration for his team and looked unprofessional to the client. Those delays and extra costs were eating into his profits until he finally got serious and created a simple material checklist for every job. He never made that mistake again.
Calculating Your Joint Compound Needs
Joint compound, or "mud" as we all call it, is the lifeblood of the finishing process. How much you'll need really comes down to the level of finish you're aiming for, but there’s a solid rule of thumb that will get you in the ballpark.
As a starting point, plan on one 5-gallon bucket of all-purpose mud for roughly 1,000 square feet of drywall. This should cover taping the seams and applying your standard coats. But if you're bidding a Level 5 finish where the entire surface gets a skim coat, you'll need a lot more. For that, you should figure on one 5-gallon bucket for every 350-400 square feet.
Getting this right is a game-changer. For pros working in major markets, precision is everything. Here's a tip: always measure your ceilings first. They can easily make up 20-25% of the total area and are surprisingly easy to forget in the initial count. With the global drywall and insulation market projected to hit $843.63 billion by 2030, accurate bids are what separate the businesses that thrive from those that struggle. You can dig deeper into these trends in the full industry report on the drywall market.
Choosing the Right Tape and How Much to Buy
The type of tape you use affects both the strength of the finished job and how you work. There are two main options, and knowing when to use each one is crucial.
- Paper Tape: This is the professional standard for a reason. It's non-elastic, which means it creates incredibly strong seams and sharp inside corners once it's properly embedded in mud. For estimating, a single 500-foot roll of paper tape will generally cover 1,200 to 1,500 square feet of drywall.
- Fiberglass Mesh Tape: This stuff is self-adhesive, so it’s definitely faster to apply on flat seams. It's great for patch-and-repair work. The catch? It’s not as strong as paper and should never be used for inside corners, where it's prone to cracking.
For a standard residential job, I always default to paper tape. It takes more skill to apply correctly, but the durability is worth it. Mesh tape is great for DIYers or a quick patch, but it's not what you build a reputation on.
Don't Forget Corner Beads and Fasteners
Corners are another spot where a small miscalculation can send you back to the supply house. Luckily, estimating corner beads is pretty straightforward—just measure the linear feet of all your outside corners.
A standard 8-foot corner bead is what you'll use most often. Count up the number of outside corners and add up their lengths. I always add at least one extra stick to my order. It’s cheap insurance against miscuts or a piece that gets damaged on site.
When it comes to fasteners, the math is simple. You'll need about 1,000 screws for every 1,000 square feet of drywall. This gives you plenty to follow standard fastening patterns (every 12 inches on ceilings, 16 inches on walls) and still have a healthy buffer. So, for a 2,500 square foot job, grabbing a box of 3,000 screws ensures you won't run out.
Nailing Your Labor Costs for a Profitable Bid
You can have a perfect material list, but the job won't make you a dime until you get the labor cost right. This is where most contractors either make their money or lose their shirts. If you misjudge the time, even the most accurate material count won't save your profit margin.
I know a guy—we’ll call him Mike—who ran a successful drywall business. He was winning bids left and right, but his bank account was stagnant. It turned out he was pricing every job the same, whether it was a wide-open new basement or a tricky remodel with vaulted ceilings. It was a painful lesson, but it forced him to get serious about tracking how long things actually take.
How Should You Price Your Labor?
There are a few solid ways to price drywall labor, and the best method really depends on the job in front of you. Smart contractors don’t stick to just one; they use the right tool for the job.
- By the Square Foot: This is the industry standard for new construction and bigger commercial projects. It’s professional and scales cleanly. You’ll often see rates in the $1.75 to $3.00 per square foot range for hanging, taping, and finishing.
- By the Sheet: This approach works great for smaller jobs or when you’re subbing out the work. Pricing at $45 to $65 per sheet (installed and finished) is a simple way to bid. The only catch is that it doesn't account for job complexity as well as the square foot method.
- A Flat Rate: For small, predictable repairs, this is perfect. Quoting a flat rate of $250 to patch a doorknob hole tells the customer exactly what to expect and saves you the hassle of a complex estimate.
Find Your Labor Baseline
This is the step that changed everything for Mike. He started timing his crew. He learned that on a straightforward job, his best guys could hang about 12 sheets per person in a standard 8-hour day. When it came to finishing, they could run the first coat of mud on roughly 40 sheets.
By tracking this data for a few weeks, he built a real-world baseline. He knew his crew's average speed under ideal conditions. That became the starting point for every single bid he placed.
Don’t just guess what your team can do. Track their performance on a few typical jobs. Knowing your crew’s real-world speed is the single most powerful tool you have for creating a profitable drywall estimate.
Adjusting for Job Complexity
A baseline is your foundation, but no two jobs are the same. The real art of estimating labor is knowing how to adjust that baseline for the unique challenges each project throws at you.
A smooth, empty new construction site is the easy button. Your baseline rates will probably be right on the money. But a remodel in an occupied home with 12-foot ceilings? That’s a whole different animal.
You have to account for the things that slow you down:
- High Ceilings: Anything over 10 feet means you're hauling in scaffolding or lifts. That slows the whole process down. I automatically add 15-25% to my labor estimate just for the height.
- Occupied Homes: You can't just go in guns blazing. There’s daily setup and cleanup, building dust walls, and carefully maneuvering around furniture. This can easily eat up an extra hour or two every single day.
- Tricky Layouts: Angled walls, arches, and a ton of corners mean more cutting and more detailed taping. This kind of complexity can slow a crew down by 20% or more.
I learned this the hard way on a renovation in an old house with plaster walls. My bid was based on my standard drywall rates. But the plaster was a mess, and we spent a full day just scraping and prepping surfaces before we could hang the first sheet. I hadn't factored that in, and it ate my profit. Now, I always build a "complexity multiplier" into my labor calculation.
Building Your Winning Bid
Once you’ve got your material costs and your adjusted labor costs, you’re ready to put it all together.
First, tally up your total material cost—sheets, mud, tape, and screws. Next, calculate your total labor cost by multiplying your estimated hours by your crew’s loaded hourly rate (which should include their pay, taxes, and your overhead).
The final, crucial step is adding your markup. A markup of 15-25% on top of your combined material and labor costs is standard. This is what covers your overhead—like insurance, tools, and office expenses—and, most importantly, your profit.
A winning bid is clear and professional. It breaks down the scope of work, the materials included, and the final price. Don't just send a single number. A detailed proposal shows you're a serious professional who has done their homework. If you find that creating and managing these proposals is taking up too much of your time, it might be worth looking into how a virtual assistant for a general contractor can handle that admin work, freeing you up to focus on the job site.
The Hidden Goldmine of Estimating Drywall Repairs

While big new construction projects get all the glory, I've found that the real, steady money in the drywall business often comes from repairs. These small-to-medium jobs are the lifeblood of a service company. They offer surprisingly high margins and create the consistent work that keeps your crews busy and cash flowing.
Unlike new installs where you’re just hanging board in a clean, open space, repairs demand a different kind of expertise. You have to be a bit of a detective, figuring out not just how to patch a hole, but how to make it look like it never happened. This is where a true pro stands out, and it’s why accurate estimating is so critical.
The Million-Dollar Repair Man
I know a guy, a franchisee, who built a million-dollar-a-year business doing nothing but drywall repairs. His secret wasn't some flashy new tool; it was a rock-solid process for estimating jobs. He saw that his competitors were either scaring customers away by overbidding small jobs or losing their shirts by underbidding them. He found the sweet spot right in the middle.
His whole approach was to treat every repair call like an investigation. He’d carefully assess the type of damage, figure out the prep work involved, and calculate the time needed to perfectly match the existing texture. By mastering this, he turned what many contractors see as nuisance calls into a serious revenue stream.
This is a market you just can't afford to ignore. The global drywall repair market hit USD 5.1 billion in 2023 and is on track to more than double to USD 10.22 billion by 2033. For many home service businesses, this steady work can easily account for 20-30% of total revenue, a trend you can explore further by reviewing the latest market data for drywall repair services.
Sizing Up the Damage to Price It Right
The first thing you need to do on any repair job is get a clear picture of the damage. Every problem needs a different solution, which means a different cost in time and materials.
- Nail Pops and Stress Cracks: These are your bread and butter. They’re usually quick fixes requiring just a little compound and some touch-up paint. The key to making money here is efficiency. I often see guys bundle these into a visit or have a minimum service call fee.
- Small to Medium Holes: We're talking about doorknob holes or accidental bumps up to a few inches across. These typically need a simple patch (like a California patch) and a couple of coats of mud. The labor goes up a bit, but your material cost is still very low.
- Large Holes (Over 6 inches): Now we're getting into more serious work. You’ll need to cut out the damaged section square and install a new piece of drywall. This takes more skill, time, and materials—you'll need backing strips, screws, tape, and several coats of mud to blend it in. Your estimate has to reflect that extra work.
- Water Damage: This is the ultimate wild card. You're not just replacing a stained piece of drywall; you have to make sure the leak is fixed first. Your estimate must include the time to cut out all the affected material, inspect for mold, and let the area dry completely before a single new board goes up.
The biggest mistake I see contractors make is focusing only on the hole itself. The real cost is often hidden in the prep work, dust control, and getting your crew to the site. A "simple" patch in a furnished, high-end living room is a completely different job than the same patch in an empty garage.
Common Drywall Repair Estimate Guide
To help you get a feel for pricing these common jobs, I've put together a quick-reference table. This isn't a substitute for a detailed on-site estimate, but it's a great starting point for understanding the time and materials involved in different types of repairs.
| Type of Damage | Typical Size | Estimated Labor Time | Key Material Needs |
|---|---|---|---|
| Nail Pop/Stress Crack | Single pop or < 12" crack | 15-30 minutes per spot | Joint compound, primer |
| Doorknob Hole | 2-3 inches | 1-2 hours (over 2 visits) | Patch kit or scrap drywall, mud, tape |
| Medium Hole | 4-8 inches | 2-3 hours (over 2-3 visits) | Drywall piece, backing, screws, tape, mud |
| Large Hole | 8-24 inches | 3-5 hours (over 3 visits) | Half-sheet of drywall, 2x4s for backing, screws, tape, mud |
| Water Stain/Damage | Varies | 4-8+ hours (multiple visits) | All of the above, plus mold treatment, drying time |
Remember, this guide gives you a baseline for a standard room. You'll need to adjust your final price based on texture matching, paint, and other job-specific factors we'll cover next.
Factoring in the "Invisible" Work
The last, and maybe most important, piece of a profitable repair estimate is accounting for all the extra work that leads to a happy customer and a 5-star review.
- Dust Containment: In an occupied home, sealing off the work area with plastic sheeting isn't optional—it's essential. The time it takes to set this up and tear it down needs to be in your price.
- Texture Matching: This is a true art. Whether you're dealing with orange peel, knockdown, or some wild custom texture from the 70s, making it match perfectly takes real skill and time. Always add a line item for this.
- Priming and Painting: Is your responsibility to just prime the patch, or are you painting the whole wall corner-to-corner for a perfect blend? Make sure this is crystal clear with the customer and priced into the job.
When you start including these details, your estimates become more accurate and your business instantly becomes more profitable. This level of detail also shows the customer they're paying for a professional, seamless result, not just a quick patch. And when those profitable repair calls start coming in, you have to be ready—it's crucial to have a system in place to always answer the phones for your home service business.
Got Questions? We’ve Got Answers on Drywall Estimating
No matter how many jobs you've bid, some situations always make you pause. Every contractor runs into the same tricky spots when estimating drywall. Let's walk through some of the most common questions and how to handle them like a seasoned pro.
How Do I Estimate Drywall for Vaulted Ceilings?
Ah, vaulted ceilings. They look great, but they can be a nightmare to estimate accurately. The secret isn't complicated math—it's just breaking that big, intimidating surface down into simple shapes you can actually measure. Most of the time, you're just looking at a couple of big rectangles and triangles.
For the triangles, don't get lost in trigonometry. I once saw a rookie estimator wrestling with complex formulas for an hour. His boss walked up, measured the base and height of the triangle, multiplied them, divided by two, and had the square footage in about 30 seconds. Keep it simple.
Once you’ve got the square footage for each shape, just add them all up for your total.
The most crucial thing with vaulted ceilings is your waste factor. Forget your standard 10%. All those complex, angled cuts generate a ton of scrap. You absolutely must budget for 15-20% waste, or you’ll be making a costly trip back to the supplier.
Should I Charge Per Sheet, Per Square Foot, or a Flat Rate?
There's no single right answer here. The smartest contractors I know are flexible and use the pricing method that makes the most sense for the job in front of them.
- Per Square Foot: This is your go-to for new construction and big remodels. It's the industry standard, it’s transparent for the client, and it scales perfectly. Most jobs fall between $2.00 and $3.50 per square foot for hanging and finishing.
- Per Sheet: This works great for smaller, straightforward jobs. Think finishing a simple, boxy garage. It’s also a common way to price things if you're just subbing out the labor to a hanging crew.
- Flat Rate: This is the king for repairs. When you've done a hundred of them, you know exactly what it takes to patch a doorknob hole. Quoting a simple "$250 to fix the hole" is clear for the customer and profitable for you.
What Is the Biggest Mistake Contractors Make When Estimating?
Forgetting to account for the job site itself. This is, without a doubt, the most common and expensive mistake I see. You can have your material and labor numbers calculated down to the penny, but if you ignore the on-site realities—what I call the "soft costs"—you can lose your shirt.
I’ll never forget watching a crew on a historic home renovation. The estimator’s numbers were perfect for a normal job. The problem? It was a second-floor job with no elevator. They spent half a day just humping drywall up a narrow staircase. That one oversight ate their entire profit margin.
Before you finalize any bid, walk the site and ask yourself: "What's going to slow us down here?" Is it a house full of furniture that needs to be protected? Are there tons of can lights and outlets to cut around? These factors are just as important as the square footage.
How Can Technology Make My Drywall Estimates More Accurate?
Using the right tools can give you a serious edge. At a bare minimum, every estimator should have a laser distance measurer. It's faster, more accurate than a tape measure, and many can calculate area and volume for you on the spot.
If you’re looking to scale your business, estimating software is the next logical step. I know a franchise owner who started using a simple app on his tablet. He can build a professional-looking bid right there during the walkthrough. He told me his closing rate jumped by 20% because he gives the client a firm price immediately, striking while the iron is hot. It takes all the guesswork out of the process.
Are you spending too much time creating estimates and not enough time closing deals? Let Phone Staffer handle the lead generation for you. We find qualified prospects, make the calls, and set the appointments, so you can focus on winning jobs and growing your business. Learn more about how we can help.