A lot of home service owners are sitting on the same kind of work without treating it like a service line. Shower caulking is one of those jobs. It shows up as a favor during a bathroom repair, a quick add-on after tile work, or a cleanup item at the end of a remodel.
That’s a mistake.
A clean, durable caulk line solves a problem homeowners notice fast. They see the mold. They see the peeling edge. They scrub it, ignore it, then call when the bathroom still looks dirty. If you know how to turn caulking for shower work into a repeatable offer, you get a service that’s easy to explain, easy to schedule, and useful as both a standalone job and an upsell.
Why a Perfect Caulk Line Is Your Business's Best Friend
A homeowner calls after trying to fix the same shower corner three times. The bead keeps peeling, the mildew keeps showing through, and now she wants someone who can make it stay fixed. That call is not about a tube of caulk. It is about confidence, appearance, and stopping water from getting where it should not.
That is why a clean shower caulk line carries more weight than its price tag suggests. Homeowners notice it immediately. They run a hand along it, look at the corners, and decide within seconds whether the bathroom feels cared for or patched together. If your crew removes the old sealant completely, gets the joint dry, and leaves a straight, tight bead, the result looks finished the same day. Customers remember finish work they can see.
The risk side is real too. The Insurance Information Institute explains that water damage and freezing claims are among the most common homeowners insurance losses, and repeated seepage or leakage is typically excluded from coverage because it is considered a maintenance issue, not a sudden event. In a shower, that distinction matters. A failed bead at a pan joint or vertical corner can turn into staining, swollen trim, loose base, or hidden moisture behind finishes long before the homeowner realizes what is happening.
Why homeowners judge your whole company by this one detail
A customer cannot easily inspect blocking, slope, or waterproofing. They can inspect a caulk line.
If the bead is wavy, smeared onto tile faces, or already shrinking away from the joint, they assume the same level of care showed up everywhere else. That is the primary business value of this job. Good caulking protects the assembly, but it also sells your standards without a speech.
A well-executed line earns its keep in three ways:
- It reduces visible failure points: Corners, pan transitions, and wall-to-tub joints are the places customers watch first.
- It sharpens the finish: Even older tile looks cleaner when the perimeter joints are cut out and re-sealed properly.
- It supports premium pricing: Homeowners pay more willingly when the work looks deliberate instead of rushed.
I have seen expensive bathroom jobs lose referral value because the last visible detail looked like an afterthought. I have also seen simple re-caulking jobs turn into repeat annual maintenance work because the first visit was handled like a finish trade, not a cleanup task.
There is a reason precision matters so much here. The modern caulking gun gave the trade a controlled way to place sealant consistently, which changed caulking from a rough patch job into finish work. RepcoLite’s overview of caulk history traces that shift and notes Theodore Witte’s 1894 patent for the caulking gun, a tool that still defines how pros control bead size, speed, and waste in the field.
The business owner’s version of the job
An amateur fills a gap. A business owner should see a service with clear margins, repeat demand, and easy before-and-after marketing.
Treat shower caulking as side labor and you get uneven results, undertrained techs, and callbacks that wipe out profit. Treat it as a defined offer and you can script the inspection, standardize the process, price it by shower type, and add maintenance reminders six or twelve months later. That gives you a small job that is easy to schedule, easy to explain, and easy to upsell during tile repair, bathroom cleaning, handyman visits, and remodel punch lists.
A perfect caulk line does more than finish the shower. It lowers callback risk, gives homeowners a visible win, and creates a repeatable service your team can sell with confidence.
Choosing Professional-Grade Caulking for Showers
A new tech grabs a paintable tube from the truck because it is cheaper, easier to tool, and sitting right there in the bin. Six months later, the bead shrinks, the corner opens, and your office is handling a warranty call that never should have existed. That is how small material decisions turn into lost margin.
For shower work, set one clear standard. Use 100% silicone in wet areas. Keep that rule consistent across every truck, every tech, and every estimate. Silicone became the trade standard for wet, high-movement joints because it holds flexibility and adhesion better than older caulking materials, as noted in Quality Seal Australia’s overview of caulking and sealant materials.
Material choice affects three parts of the business at once. Job durability. Warranty exposure. How confidently your team can explain the service.

What works in showers and what doesn’t
Acrylic latex has one advantage. It is easy for inexperienced hands to clean up.
That convenience does not help much in a shower. Wet corners, pan transitions, and glass-to-tile joints move, stay damp, and collect soap residue. Acrylic products are better suited to dry interior trim and paintable gaps, not daily wet exposure. If you use them in a shower, you are often selling a redo.
Hybrid sealants sit in the middle. Some perform well in the right application, but they require tighter product selection and tighter training. For a home service company trying to reduce mistakes, one proven silicone line usually beats giving the field a dozen options and hoping every technician chooses correctly.
Caulk type comparison for professional use
| Caulk Type | Average Lifespan (Shower) | Flexibility | Mold Resistance | Ideal Use Case | Business Impact |
|---|---|---|---|---|---|
| 100% Silicone | Long service life when installed correctly | High | Strong for wet areas | Shower corners, tub-to-tile joints, glass-to-tile joints | Best fit for fewer callbacks and stronger warranty confidence |
| Acrylic Latex | Shorter life in constant moisture | Lower | Weaker in wet conditions | Dry interior trim and paintable gaps, not shower wet zones | Lower tube cost, higher redo risk |
| Hybrid Sealants | Product-specific | Varies by product | Varies by product | Selected applications based on manufacturer guidance | Can work well, but adds training and purchasing complexity |
The terms owners should teach their team
Your technicians do not need to sound like product reps. They do need to explain the recommendation in plain language.
- 100% silicone is the standard for wet-area joints because it stays flexible and bonds well to common shower surfaces.
- Mildew-resistant describes the product, not the installation quality. Bad prep still causes failure.
- Movement capability matters at changes of plane where walls, pans, tubs, and enclosures shift slightly over time.
- Adhesion to non-porous surfaces matters on tile, glass, metal trim, and acrylic, where weak bonding shows up fast.
A simple sales line works well at the kitchen table: “For shower joints, we use professional-grade silicone because paintable caulk fails early in wet areas.”
Practical buying rules for owners
Buy for job cost, not tube cost. The cheapest cartridge on the shelf is often the most expensive one after labor, scheduling, and warranty handling are counted.
Use a short purchasing standard:
- Standardize one wet-area sealant: Pick one 100% silicone product your team trusts and stock it on every truck.
- Choose colors on purpose: White, clear, and color-matched options should match the fixture and tile, not whatever is left in inventory.
- Train one application method: Fewer product variations make bead quality more consistent and make new-tech training faster.
- Spell out the material in the estimate: Say the job includes professional wet-area silicone, surface prep, and cure-time instructions.
That wording does two jobs. It raises the perceived value of a small-ticket service, and it helps justify a better price than “replace old caulk.”
If you want this to become a repeatable service line, keep the offer simple. One approved product family. One scope. One warranty standard. One short script your CSR and field techs can both use: “We remove failed caulk, install wet-area silicone, and leave the shower sealed and ready for proper cure.” That is easier to sell, easier to train, and easier to price without guesswork.
The Pro Caulking Process From Start to Finish
A good shower caulk job is won before the tube opens. Most failures come from prep mistakes, not from a bad trigger squeeze. A professional method using 100% silicone can achieve a 95% watertight seal lasting over 7 years, and the biggest failure points are incomplete removal, damp surfaces, and early water exposure, according to LATICRETE’s guidance on using the right caulk for the job.

Removal decides whether the new bead has a chance
Old caulk has to come out completely. Not mostly. Completely. LATICRETE notes that incomplete removal causes 40 to 50% of adhesion failures in this type of work. That lines up with what most experienced techs have seen in the field. New silicone over residue is just a prettier failure.
On fiberglass and acrylic pans, a plastic razor blade is safer than getting aggressive with metal. On tile, a utility knife works well if the hand behind it is steady. Score both edges, peel the bulk out, then chase the leftovers until the joint is clean.
After the physical removal, clean the joint. Soap and water remove grime. Isopropyl alcohol helps clear residue before the new bead goes in. If mildew is present, deal with it before sealing. Caulk doesn’t fix contamination trapped under it.
Prep checklist that prevents rework
- Cut the old line fully: Score along both bond lines so you remove the bead instead of tearing at random.
- Clear the residue: Leftover silicone film is enough to ruin the bond.
- Wash and rinse the joint: Surface dirt, soap film, and body oil all interfere with adhesion.
- Dry longer than you think: LATICRETE notes a 2 to 4 hour minimum dry time before application in this process.
- Tape for control: Place painter’s tape about 1/8-inch from the joint if you want a tighter visual finish.
Dry means dry
This represents a common pitfall for amateurs. A shower can look dry and still hold moisture in the joint, especially in corners and pan transitions. LATICRETE states that damp surfaces reduce adhesion by 60%, which explains why some fresh caulk lines peel even when they looked fine on day one.
I’d rather delay a job than trap moisture under silicone. If the bathroom is humid, get airflow going, leave the door open, and let the joint rest. Speed here creates callbacks later.
The customer won’t remember that you waited a little longer for the surface to dry. They will remember the line that peeled.
Application is controlled, not rushed
Once the joint is clean and dry, the application itself should look boring. Boring is good. Fast hands and a big bead usually mean cleanup and waste.
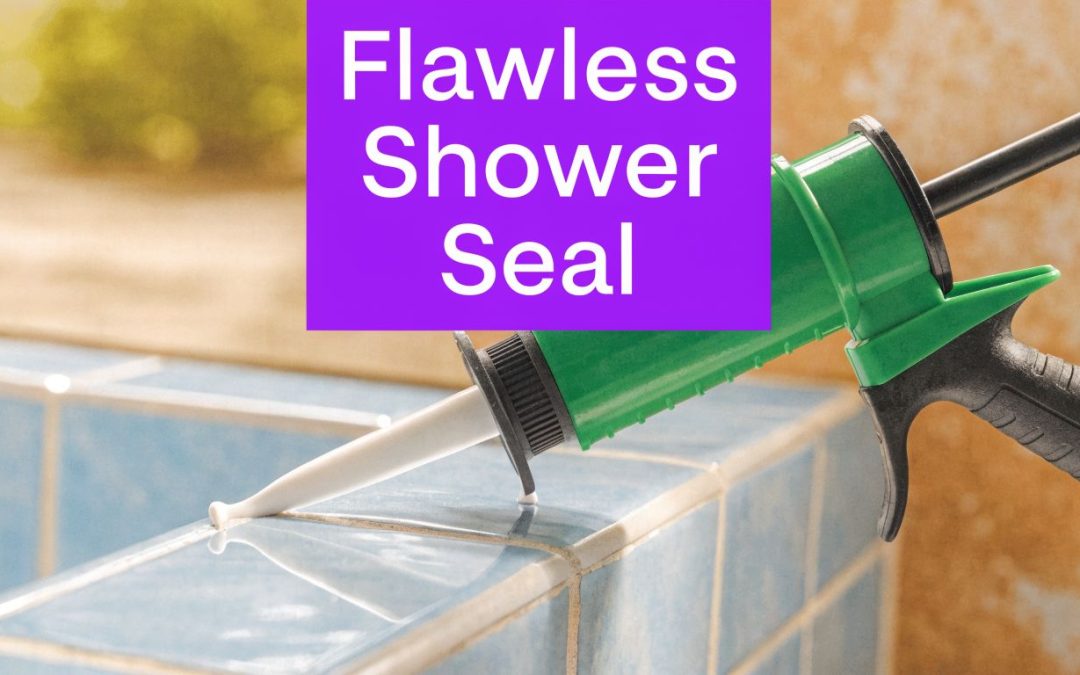
LATICRETE’s step guidance is specific for a reason. Cut the nozzle to about a 3/16-inch opening, hold the gun around a 45° angle, and run a continuous 1/4-inch bead in short sections of about 2 to 3 feet. That setup gives you enough material to fill the joint without drowning it.
The trick is pressure control. You want the bead to contact both sides of the joint consistently. Some techs pull the gun. Some push it. What matters is that the bead is forced into the joint instead of just laid on top of it.
Here’s a useful visual reference before getting deeper into technique.
Tooling is where pro work separates itself
A lot of DIY jobs fail visually even when the joint technically sealed. The line is too fat, too flat, or smeared over the tile edge. Tooling fixes that, but only if it’s done on time.
LATICRETE advises tooling within 5 to 7 minutes. That’s the window before the skin starts working against you. Use a wet gloved finger or a proper tooling tool with light pressure to shape a concave bead that sheds water. According to the same guidance, correct tooling can remove 90% of tooling errors.
A common shop mistake is overworking the line. One pass to shape it is usually enough. Keep wiping and fussing with it and you’ll drag material out of the joint.
What the finished bead should look like
- Concave, not bulging: Water should move off it, not sit against it.
- Bonded edge to edge: No pinholes, skips, or tiny fish-mouth gaps at the sides.
- Consistent width: Corners can vary slightly, but the eye should read it as one clean line.
- Minimal cleanup outside the tape line: Sloppy edges signal rushed work.
Cure time is part of the job, not an afterthought
The final mistake happens after the technician leaves. Somebody in the home uses the shower too soon. LATICRETE notes that premature water exposure causes a 30% failure rate via weakened bonds, and advises waiting 24 to 48 hours before water exposure.
That means your process should include a handoff. Tell the customer the shower is out of service until the cure window passes. Put it in writing if needed. If you don’t set that expectation clearly, you’ll end up owning a failure you didn’t create.
For teams, this is the full sequence worth teaching and repeating:
- Remove every trace of old caulk.
- Clean the joint completely.
- Dry the area thoroughly.
- Tape if appearance matters.
- Apply a controlled bead with the right nozzle size.
- Tool once, cleanly, within the working window.
- Instruct the customer on cure time before leaving.
That’s the difference between “we also do caulk” and a service you can stand behind.
Troubleshooting and Selling Proactive Maintenance
Most shower caulk calls come in after the homeowner sees something ugly. Black spotting, peeling corners, a bead that split where the wall meets the pan. If your tech only replaces the line without explaining why it failed, you miss the bigger business opportunity.
The smarter move is diagnosis first, then repair, then maintenance positioning.

What common failures usually mean
A moldy line doesn’t always mean the shower itself is leaking. Sometimes it means the previous installer used the wrong material, sealed over contamination, or left a rough bead that holds water and soap film. A peeling line often points to poor surface prep. A split line usually means movement plus a material that couldn’t flex enough.
The customer doesn’t need a chemistry lecture. They need a clear explanation that ties the problem to a better solution.
Try language like this:
“This didn’t fail just because it got old. It failed because the joint wasn’t set up for a wet area. We remove the old material completely, dry the joint, and use 100% silicone so the new line has a better chance to last.”
That kind of explanation does two things. It justifies the service. It also separates your company from whoever did the last quick fix.
Why proactive inspections are easier to sell than full repairs
Homeowners wait too long because they think they’ll see a crack before damage starts. That’s not always how it works. A 2025 NAHB study found that 68% of shower failures from water intrusion occur 18 to 24 months post-install, often before visible cracking, and that silicone can lose 40% of its elasticity in the first year, according to the summary provided by Providence Homes’ article discussing shower caulking and the cited NAHB findings.
That makes a strong case for a scheduled inspection offer. Not a hard sell. A simple checkup.
What to include in a bathroom maintenance visit
- Joint inspection: Check corners, horizontal changes of plane, and glass or trim transitions.
- Moisture warning signs: Look for discoloration, soft spots, or recurring mildew at the same locations.
- Surface condition review: Identify where the bead is still attached but beginning to lose shape.
- Replacement recommendation: Recaulk selected joints before the customer has a larger cleanup or leak issue.
A lot of contractors already run maintenance plans in HVAC, plumbing, or electrical. The structure can be borrowed. If you need a framework for building recurring service offers, this definitive maintenance plan template for contractors is useful because the logic transfers well to bathroom and wet-area inspections.
How to make the office support the service
This service line gets stronger when the office isn’t waiting for customers to call in angry. A receptionist or remote admin can tag customers who had bathroom work, set reminder intervals, and book inspection windows before the failure becomes obvious. For owners building that support function, a trained home service receptionist solution can help handle the follow-up rhythm without dropping leads or leaving callbacks to chance.
Here’s the message I’d train staff to use:
- After install follow-up: “We’re checking in to make sure the bathroom seal lines still look clean and tight.”
- Maintenance reminder: “Shower sealants can weaken before visible cracking shows up. We offer a quick inspection to catch issues early.”
- Problem conversion: “If you’re seeing dark spots or lifting edges, we can inspect the joints and tell you whether it needs cleaning, recaulking, or a deeper repair.”
That’s how you move from reactive patch jobs to recurring work with a clear reason behind it.
Turning Caulking Into a Profitable Service Line
A lot of owners make this job harder than it needs to be. They either bury it inside bigger estimates or price it casually because “it’s just caulk.” That approach hurts margin and trains customers to think the work has little value.
Caulking for shower work is useful because it’s simple to explain, low in material complexity, and easy to bundle with bathroom services. It also gives your callers and CSRs a service people understand immediately. Nobody needs an education to know their shower corners look bad.

Three pricing models that actually work
You asked for pricing and scripts, so here’s the practical version. The right model depends on how your business already sells labor.
Flat-rate for standard shower recaulking
This is the easiest model for most home service companies. One standard shower. Defined scope. Remove old caulk, prep, apply pro-grade silicone, tool, and provide cure instructions.
Flat-rate pricing works best when:
- Your team follows one standard process
- The shower types are fairly predictable
- You want quick quoting over the phone
- You don’t want technicians improvising prices on site
Customers like it because there’s less ambiguity. Office staff like it because they can book faster.
Per linear foot for larger or irregular jobs
Use this when you’re dealing with oversized showers, multiple wet walls, glass enclosures, bench transitions, or steam shower details. Per-foot pricing keeps you from underbidding unusually long joints.
This model also helps when a customer wants partial recaulking rather than a full refresh. You can measure what’s being replaced and explain the price logically.
Bundled upsell inside bathroom service work
The job's operational profitability is maximized in these situations. If your tech is already in the bathroom for tile repair, fixture replacement, leak diagnosis, or grout cleaning, adding recaulking is often the cleanest upsell in the home.
Examples of practical bundles:
- Grout and caulk refresh
- Leak check plus wet-area reseal
- Bathroom cleanup finish package
- Turnover service for rental units
How to build your own price instead of guessing
I’m not going to invent numbers and pretend they fit your market. Price from your own operation.
Use a simple worksheet with these inputs:
| Cost item | What to include |
|---|---|
| Materials | Silicone, tape, blades, gloves, cleaning supplies, disposable rags |
| Labor time | Removal, prep, application, cleanup, customer walkthrough |
| Travel | Drive time, fuel, dispatch burden |
| Overhead | Admin, insurance, scheduling, payment processing |
| Risk buffer | Time for difficult removal or mildew cleanup |
| Margin target | The profit you require for a standalone service call |
Owners who miss margin on this work usually undercount prep time. The bead itself is quick. The old caulk removal is where labor lives.
Charge for the ugly part of the job. That’s what most homeowners are really paying to avoid.
Packaging ideas that make the offer easier to buy
The service sells better when it has a name and a scope. “Recaulk shower” sounds like handyman work. “Wet-area seal refresh” or “bathroom water-seal service” sounds like a defined professional task.
A good package should answer four customer questions fast:
- What areas are included
- What material you use
- How long the shower stays out of service
- Whether you’re removing old caulk or just touching up
Don’t leave room for assumptions. “Touch-up” and “full removal and replacement” are different jobs and should be sold that way.
Outbound script for older housing stock
If your team is calling homeowners in neighborhoods with older bathrooms, keep the message plain and tied to prevention.
Script A
“Hi, this is [Name] with [Company]. We’re reaching out to homeowners in your area because shower corners and tub joints often start failing long before the leak is obvious. If you’ve noticed peeling caulk, dark buildup, or gaps where the shower meets the wall, we offer a professional inspection and recaulking service using 100% silicone for wet areas. Would you be open to a quick appointment to see if your shower needs a refresh before it turns into a bigger repair?”
That works because it names the visible problems first. The homeowner doesn’t need to understand elasticity loss or sealant chemistry. They just need to recognize their bathroom.
Upsell script for existing customers
This version works after plumbing, tile, or bathroom-related service.
Script B
“Hi, this is [Name] from [Company]. We recently helped with work at your home, and I wanted to mention one simple service that prevents a lot of bathroom issues. We offer shower seal inspections and recaulking for homeowners who want to catch failing joints before they start peeling or letting water behind the wall edge. If you’d like, I can get you on the schedule for a quick evaluation.”
Short is better here. Existing customers already know you. The call should feel like a useful reminder, not a pitch.
Marketing the service without making it generic
Caulking gets ignored in marketing because owners think it’s too small to feature. That’s backward. Small, concrete services often convert well because the problem is easy to picture.
What works in promotion:
- Before-and-after photos of corners and pan lines
- Simple educational posts about why shower caulk fails
- Seasonal maintenance reminders
- Bathroom refresh packages for property managers and landlords
- Targeted offers around older bath installations
If you want help thinking through narrower campaigns for one small service instead of broad, vague branding, these niche digital marketing strategies are a useful reference point.
Operationally, some owners also need help offloading admin work that grows once they start adding service lines. If you’re building support around outbound follow-up, quoting prep, or appointment coordination, this guide on how to hire a virtual assistant is worth reviewing.
What makes this service line stick
The businesses that win with shower caulking don’t treat it like side work. They do a few specific things well:
- They standardize the material.
- They train one process for removal, prep, application, and cure instructions.
- They package the service so the office can quote it consistently.
- They follow up for maintenance before customers see obvious failure.
- They use the visual result to earn referrals into bigger bathroom work.
That’s enough to turn a basic task into a dependable revenue stream.
Frequently Asked Questions for Business Owners
Should you offer a warranty on shower caulking work
Yes, but only if the scope is tight and your exclusions are clear. Warranty the workmanship on the joints you removed and replaced. Don’t warranty the whole shower assembly unless you also addressed the substrate, tile condition, drainage issues, or movement problem that caused the failure.
Put the scope in writing. Identify the exact areas recaulked, the cure instructions given to the customer, and the conditions that void coverage, such as water exposure before cure or movement caused by unrelated structural issues.
What if a customer has a leak after your service
First, don’t assume the caulk caused it. Showers can leak from plumbing penetrations, failed grout assemblies, bad pans, door frames, or wall assemblies behind the finish surface. Your tech should inspect the recaulked area, document what’s intact, and determine whether the issue is sealant failure or a separate problem.
That’s where paperwork protects you. Keep photos before removal, after prep, after application, and at completion. If you’re tightening your hiring and admin process so staff can support documentation and customer communication better, this checklist of questions for hiring a virtual assistant can help owners think through who should handle that back-office work.
Do you need special certification to sell this service
In most cases, the bigger issue isn’t certification. It’s competence, insurance, and clear representation. If your company markets shower recaulking, your technicians should know wet-area material selection, prep standards, and cure instructions well enough to deliver a consistent result.
If your state or locality regulates the broader remodeling or specialty trade work around the service, follow those rules. The recaulk itself might be simple, but once the job expands into tile replacement, wall repair, or leak correction, license requirements can change.
Should this be a standalone service or only an add-on
Both can work. Standalone recaulking is easy to market because the problem is visible and urgent to homeowners. As an add-on, it often becomes more profitable because travel and setup are already covered by the main job.
The right answer depends on your dispatch structure. If your trucks are already running bathroom-related calls, offering it both ways usually makes sense.
How do you avoid customer complaints about appearance
Train for finish, not just seal. Customers notice crooked lines more than they notice proper adhesion. Use painter’s tape when the setting calls for it, teach one tooling method, and have techs slow down at corners and end points.
Also, set expectations before you start. Tell the customer whether slight visual variation is normal on older tile, what cure time they need to respect, and what “finished” should look like. Most complaints happen when the office sold a cosmetic transformation but the field only planned a functional seal.
What should your estimate and invoice say
Be specific. “Recaulk shower” is too vague. Write that you are removing existing sealant from designated joints, cleaning and preparing the substrate, applying 100% silicone in wet areas, and instructing the customer on cure time before water exposure.
That wording protects your margin and reduces confusion. It also makes the service sound professional, which it should.
If you want to add shower recaulking as a repeatable service line, the hard part usually isn’t the field work. It’s getting enough conversations started, enough follow-up done, and enough appointments booked consistently. Phone Staffer helps home service companies do exactly that with outbound calling teams built for appointment generation.